Yoto Player (2nd Generation) SD card replacementUpdated 5 months ago
Use this guide to replace the SD card memory storage in a Yoto Player (2nd Generation). You will need a new, compatible SD Card to complete this repair.
This repair guide is suitable for those who are confident and competent with electronics, and you will need 30–40 minutes to complete these steps.
Product Guarantee
If your player is within its four-year product guarantee period and has a memory storage issue, you can contact to get a replacement. Click here to see the full product guarantee (link opens in a new tab).
By choosing to replace the SD card in your player, you will not invalidate your warranty so long as:
You follow the steps in this user guide and take reasonable care in making the replacement
The SD card used is from the list of approved SD cards below.
Approved SD Cards
We have successfully tested and recommend this Lexar 32Gb Micro SD Card from Amazon. This card is pre-formatted using FAT32 - if you use another brand of SD card, it will need to be pre-formatted - click here to view the guide to format the SD card.
What you need

- Screwdriver - PZ1 cross head, at least 50mm / 2 inches long
- Tweezers - to help disconnect cables
- Lever Tool - to prize up parts that are stuck down
- SD Card
Preparation
- Find a clean, flat surface to work on, with good lighting.
- Unplug Yoto Player and switch it off.
Step 1: Open the unit
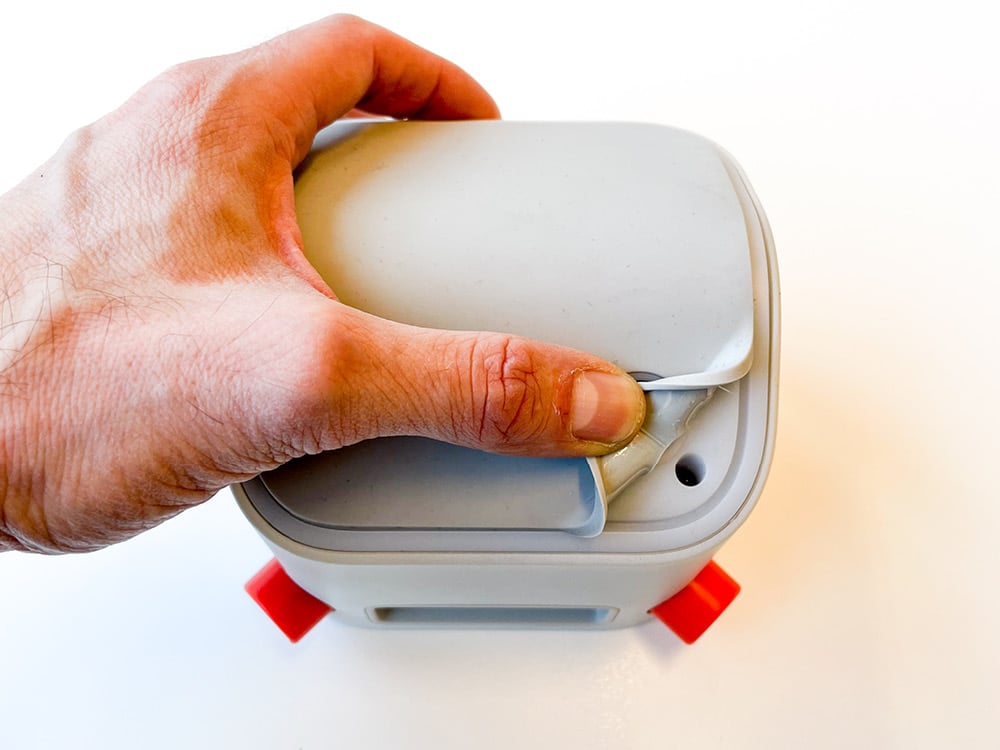
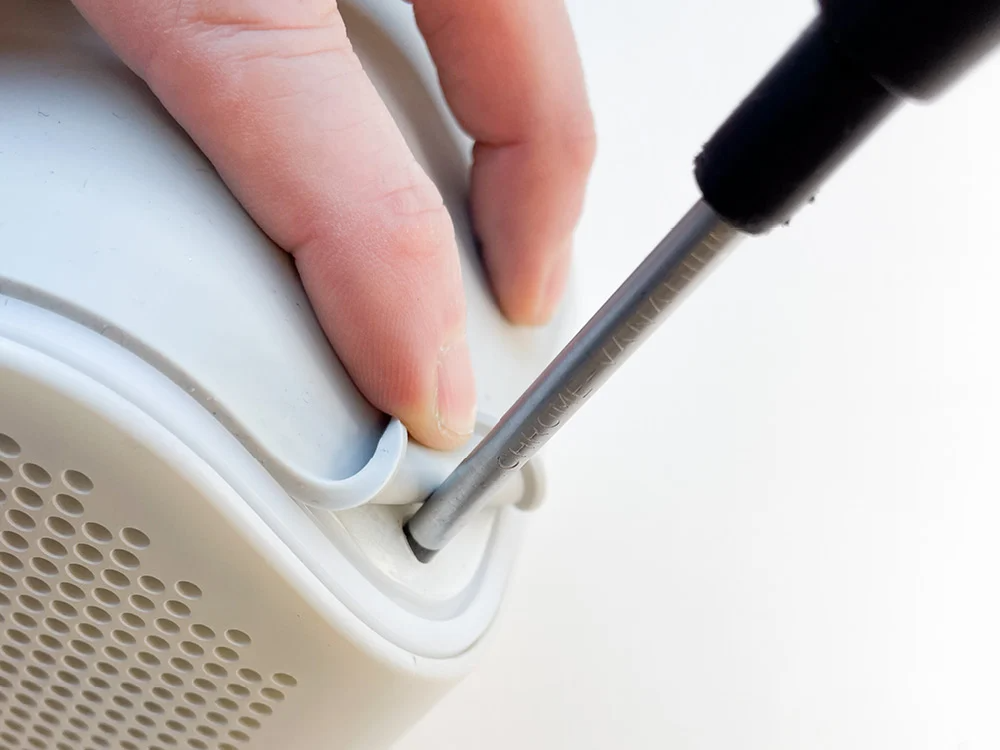
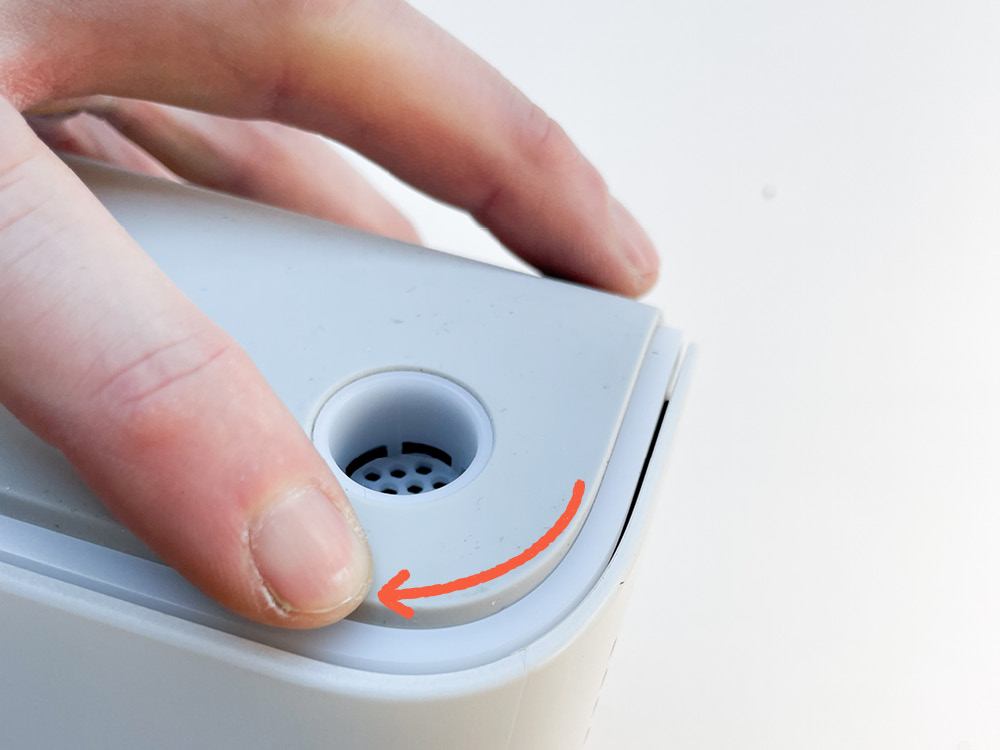
- Peel back the rubber rear surface in each of the four corners enough to reveal the screw head only.
- Unscrew each corner. If the screw head is covered by a thin film of adhesive, pierce this with the screwdriver. If screws remain in their slots, that is fine.

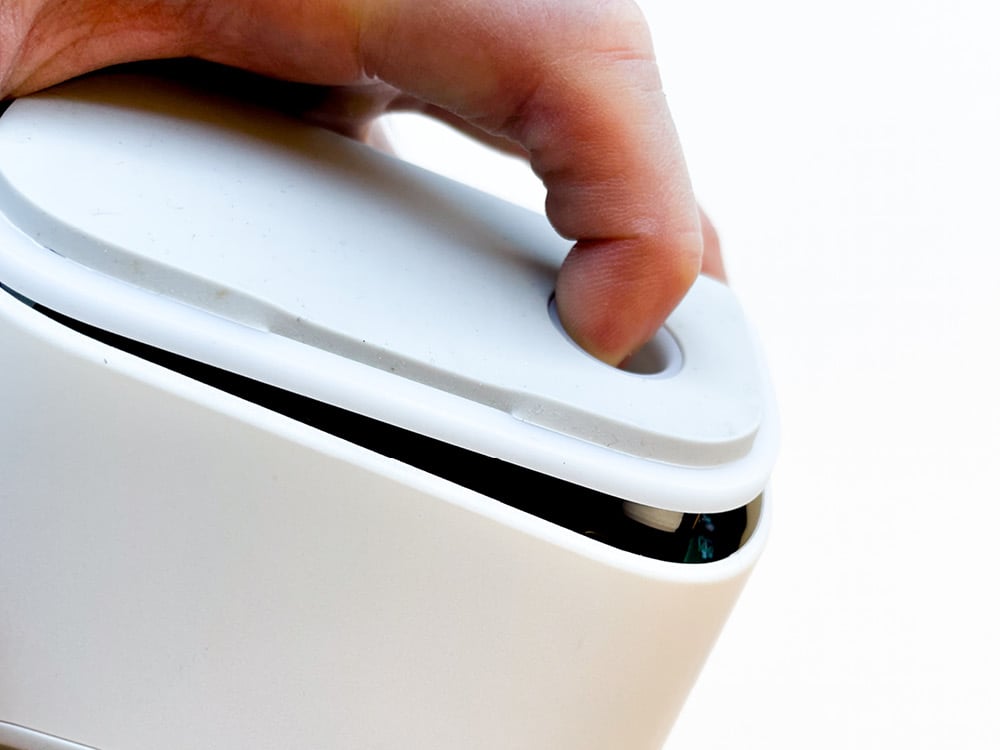
- Use the hole in the back of the Player to pull up and remove the Rear Cover. Put the cover and screws safely to one side.
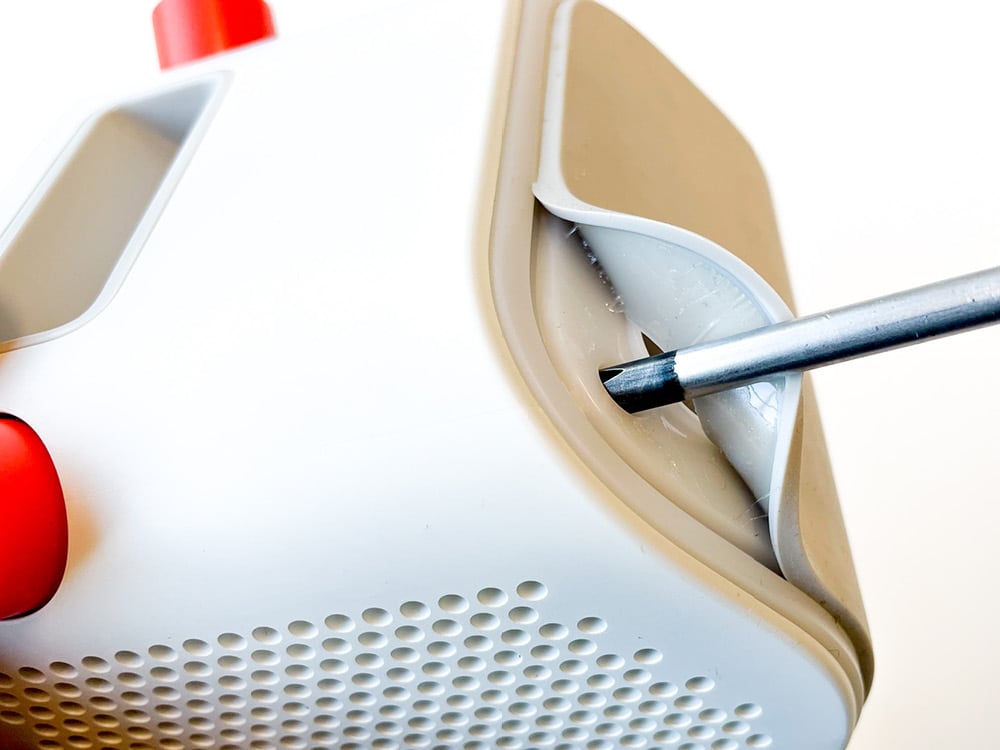
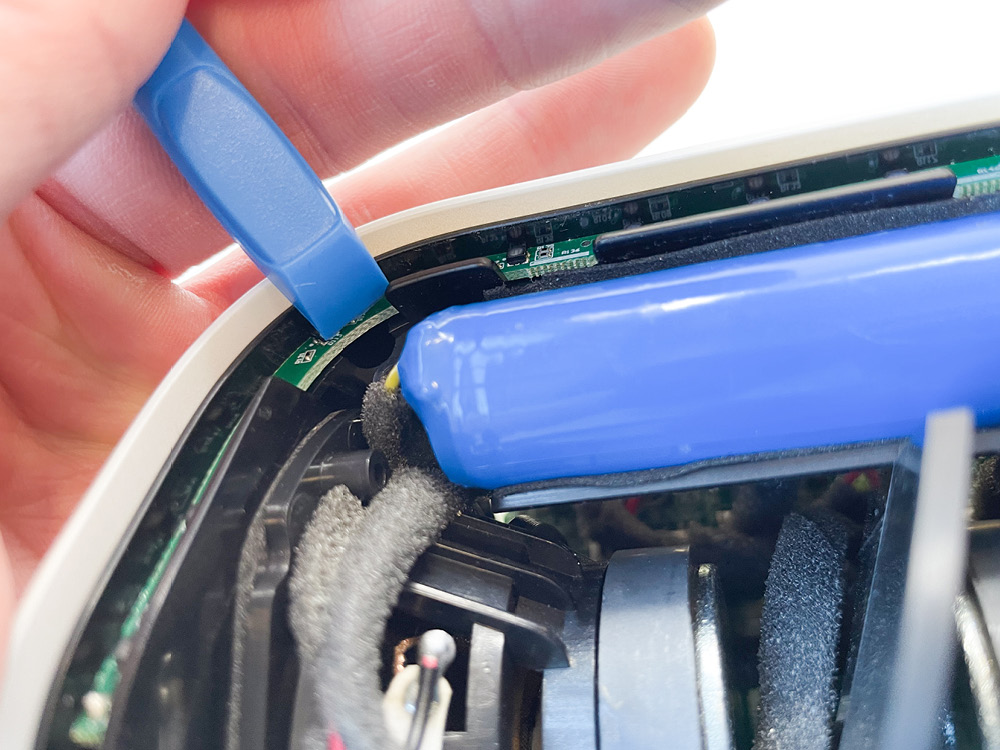
Step 2: Remove the night light LED Ring ⚠️ CAUTION ⚠️
This is the trickiest step of the whole repair, and the LED ring is rather delicate. The LED ring is held down by adhesive. Use a prizing tool gently.
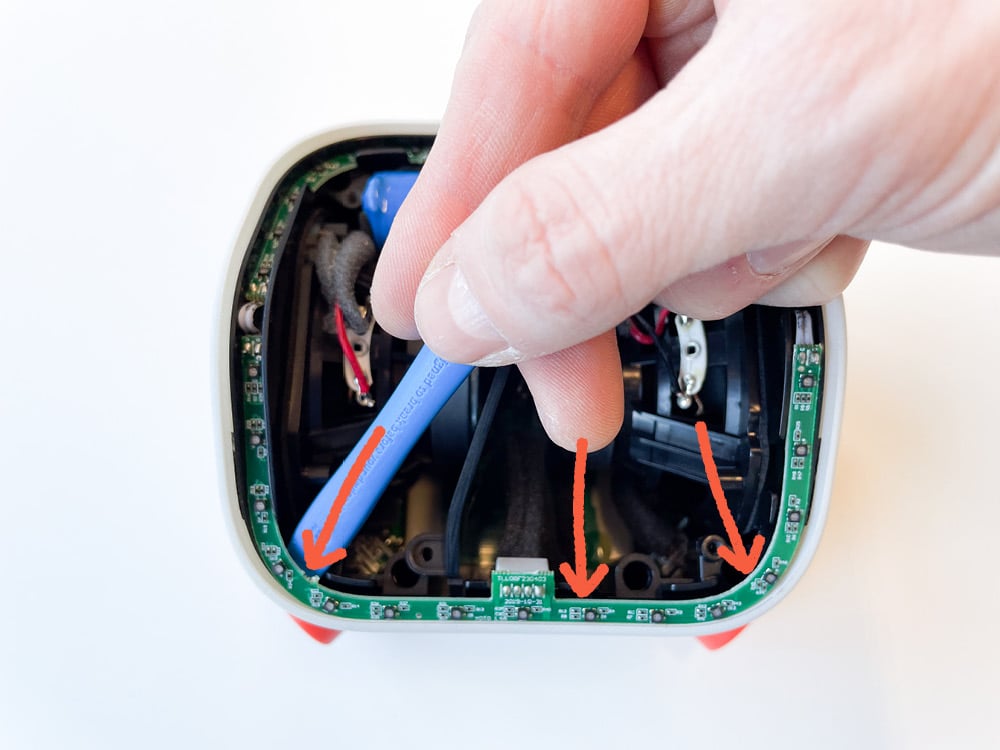
- Prize up the LED Ring using the lever tool at the points shown. Start at the side with the cable connector.
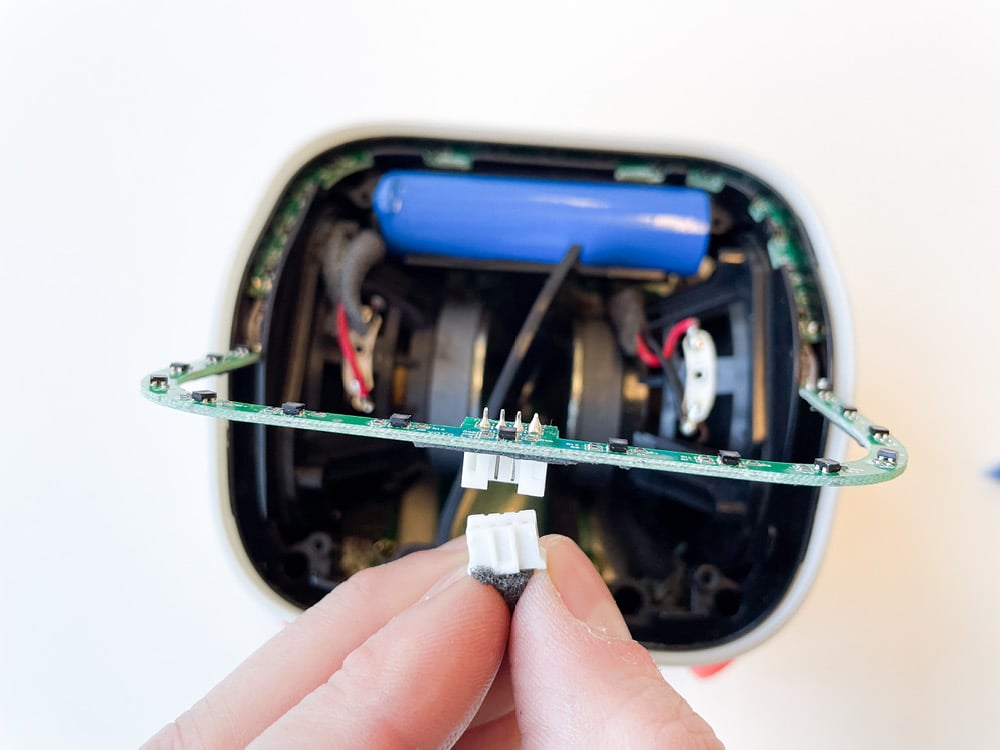
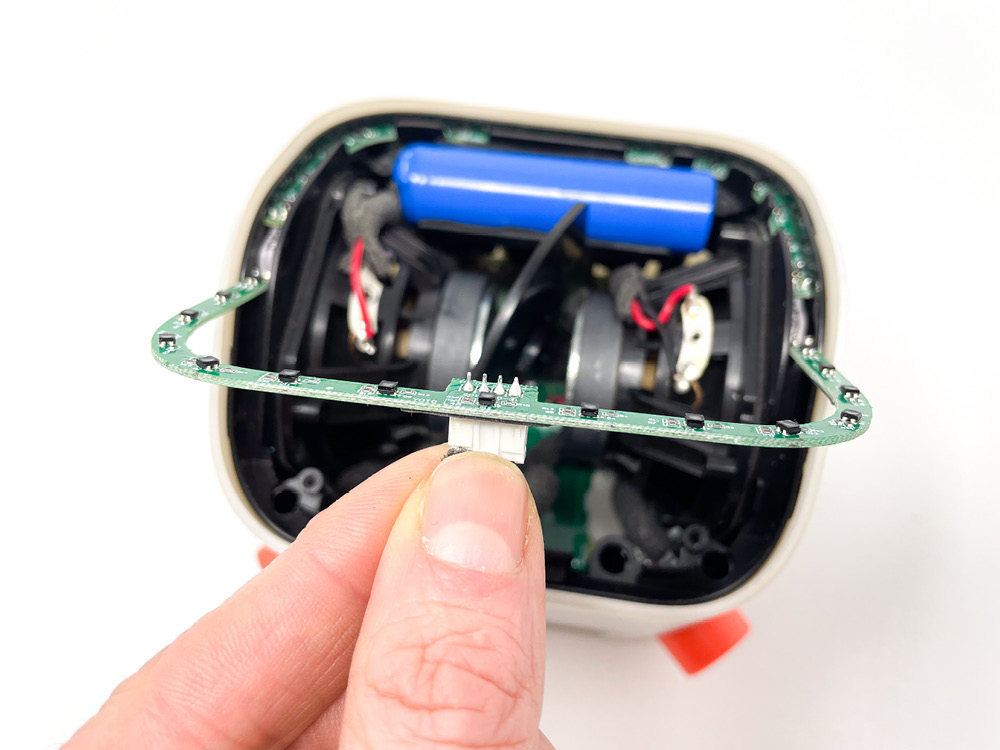
- Disconnect LED Ring from the cable.
- Prize up the other half of the LED Ring.
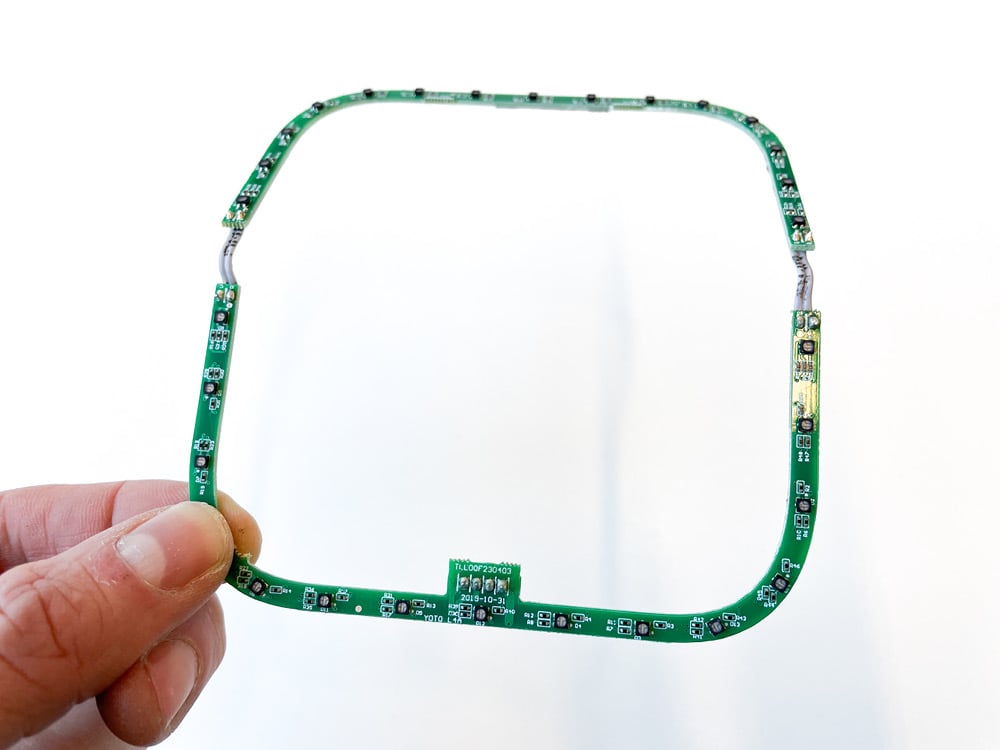
- Remove and put carefully to one side.
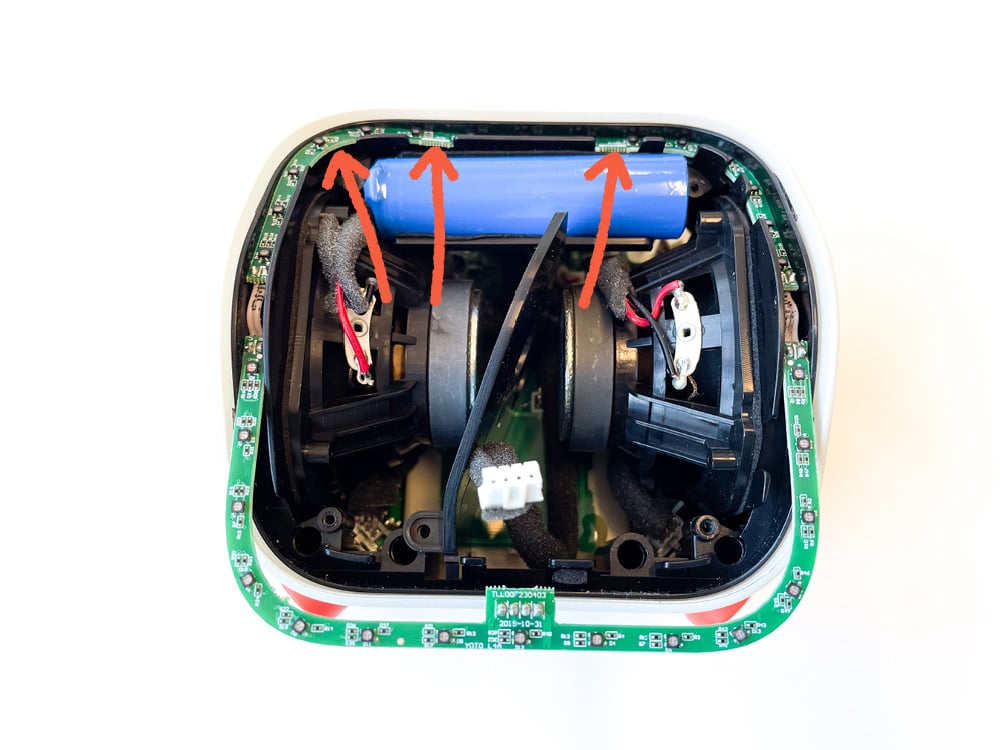
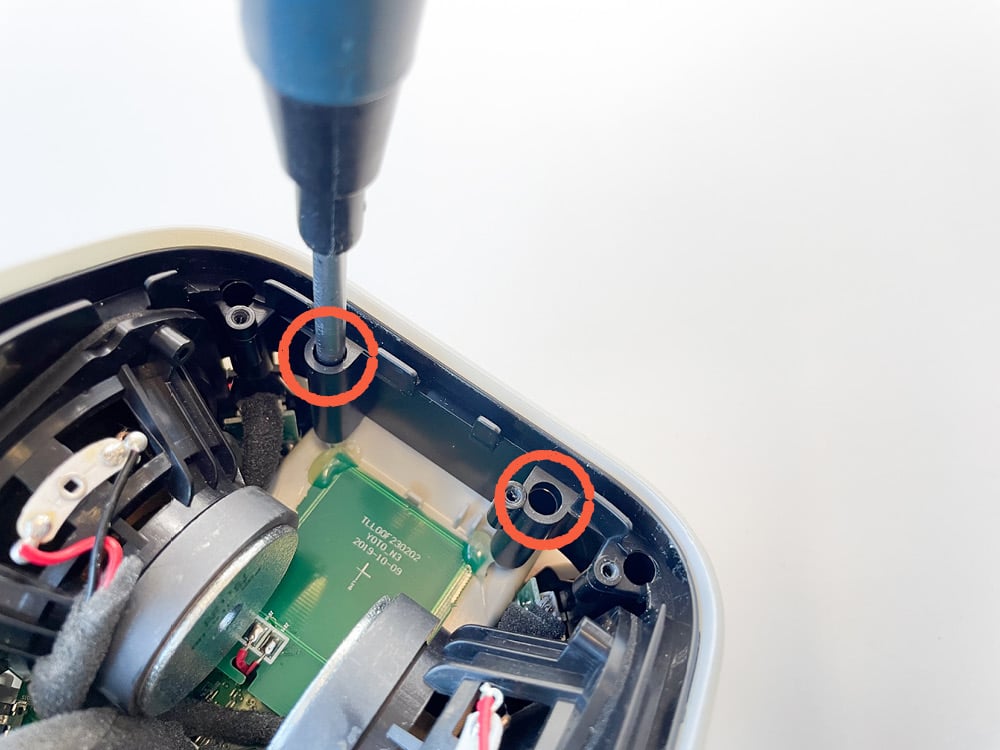
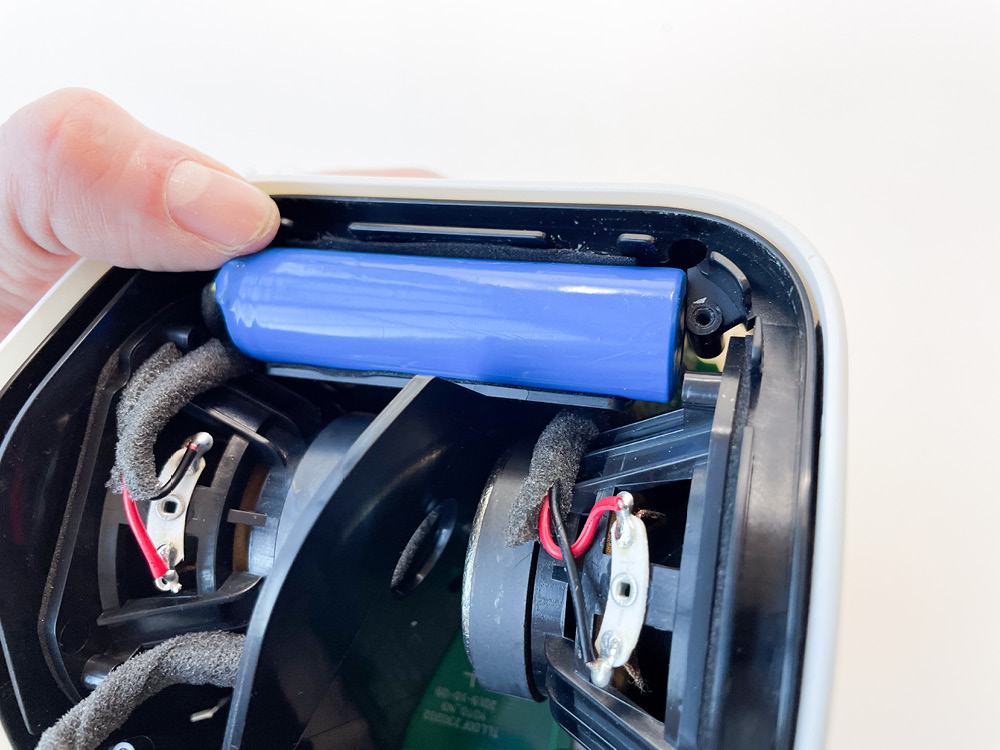
Step 3: Remove the Speaker Divider

- Lift the battery up from its cradle to reveal the two screws underneath.

- Undo the two screws under the battery (they will stay in place) and the third screw on the other side of the Speaker Divider.
- Your unit may have the Speaker Divider integrated into the main Audio Chamber. If so, continue to step 4.
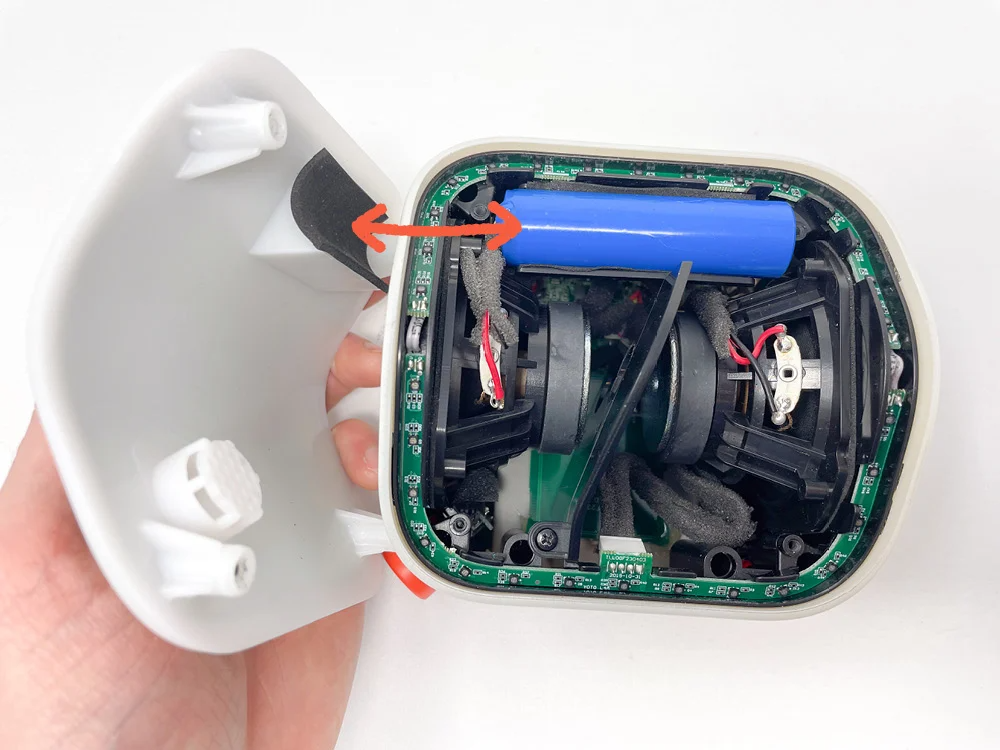
- Slide the Speaker Divider out, put it to one side along with any removed screws.
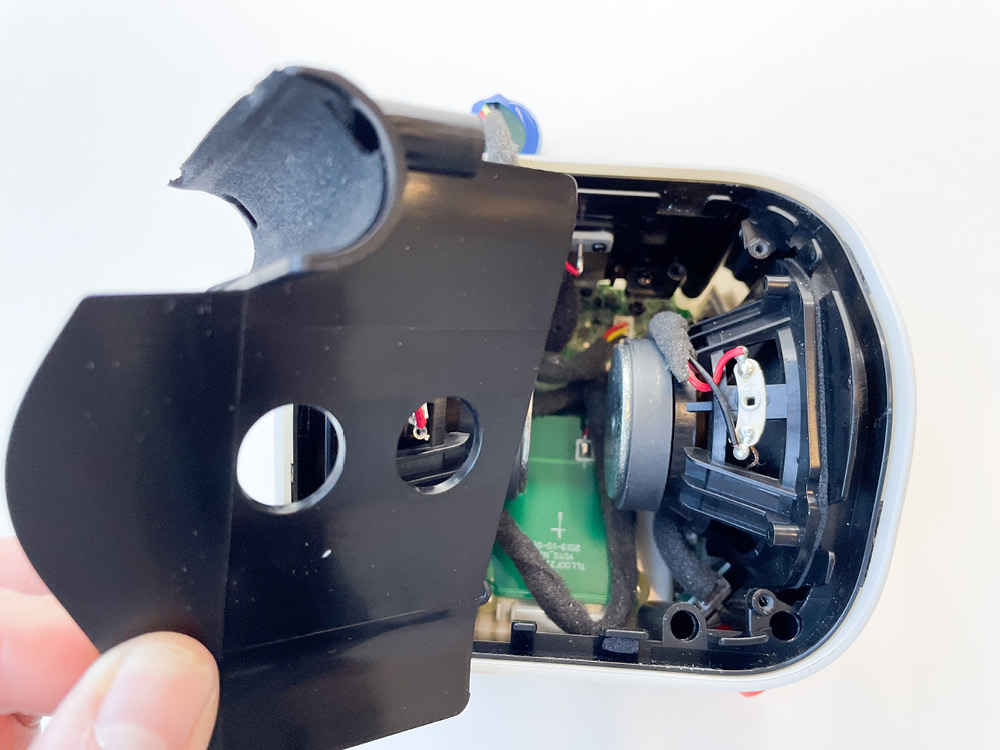
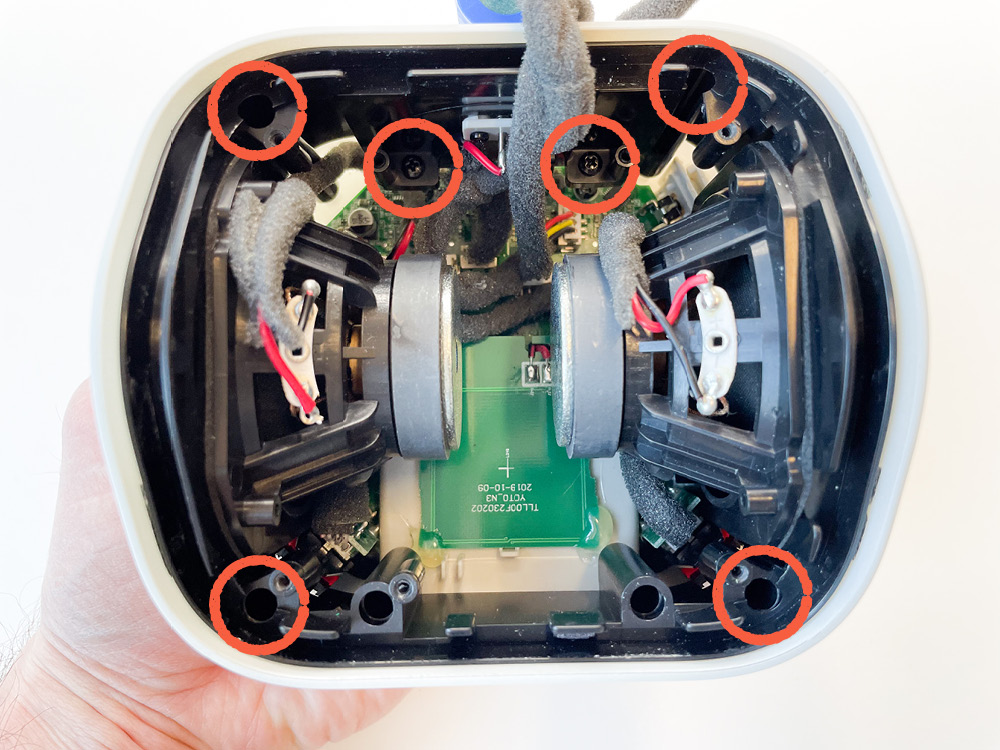
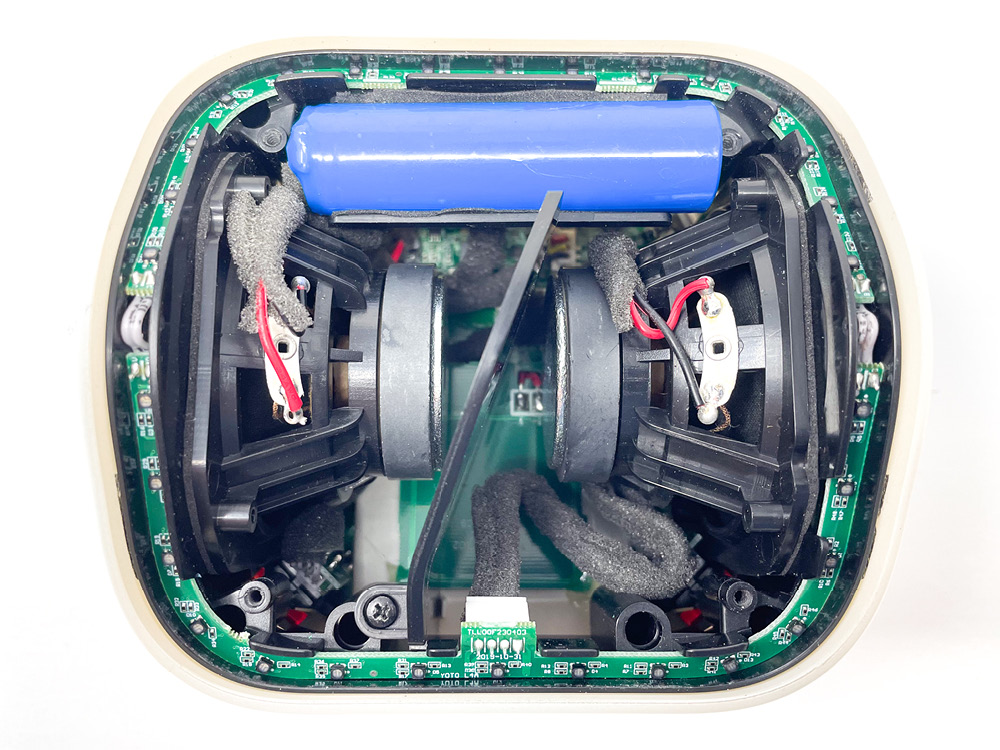
Step 4: Remove the main Audio Chamber

- Undo the 8 screws as shown. If the screws come out, put them carefully to one side, if they stay in place, that’s fine. The screw heads are quite deep inside the holes ringed in the image, so your screwdriver will need to be slim enough to fit into the holes.
- Place the battery and the night light cable in between the speakers so they don’t snag on the Audio Chamber when it is removed.
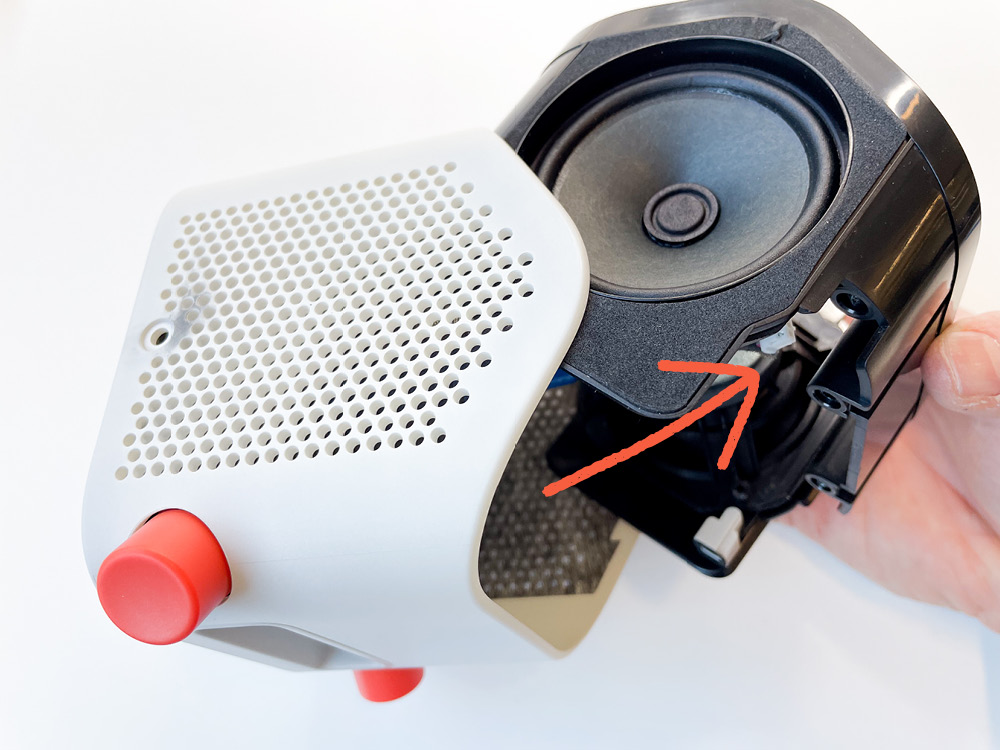
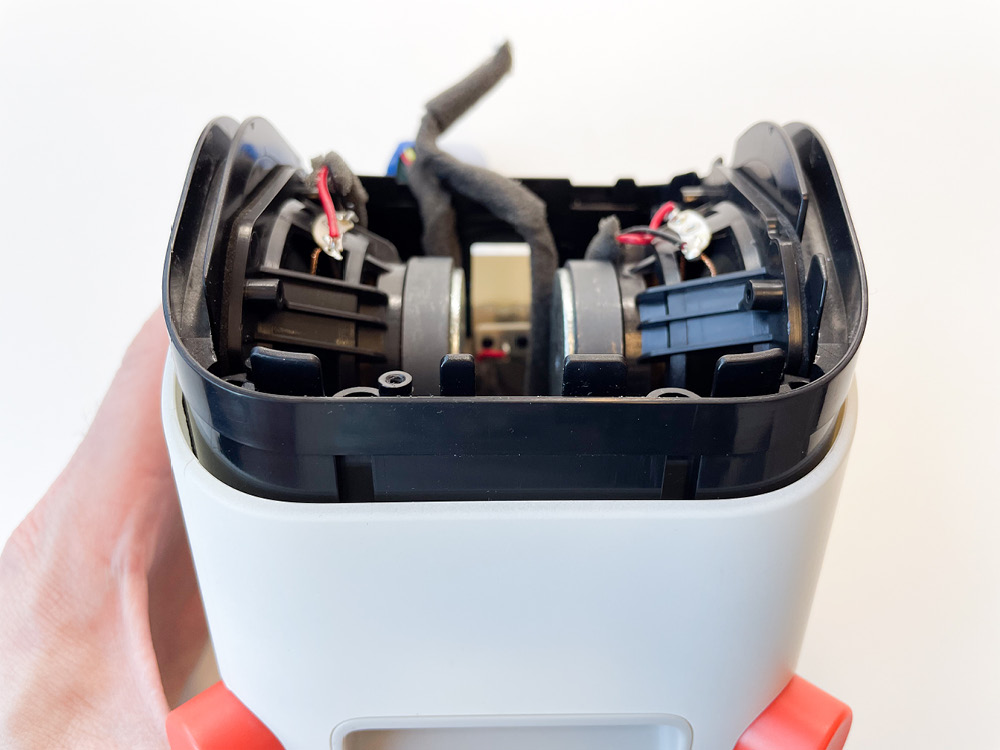
- Carefully slide out the Audio Chamber until the two speaker cables are taut, being careful not to pull too hard.
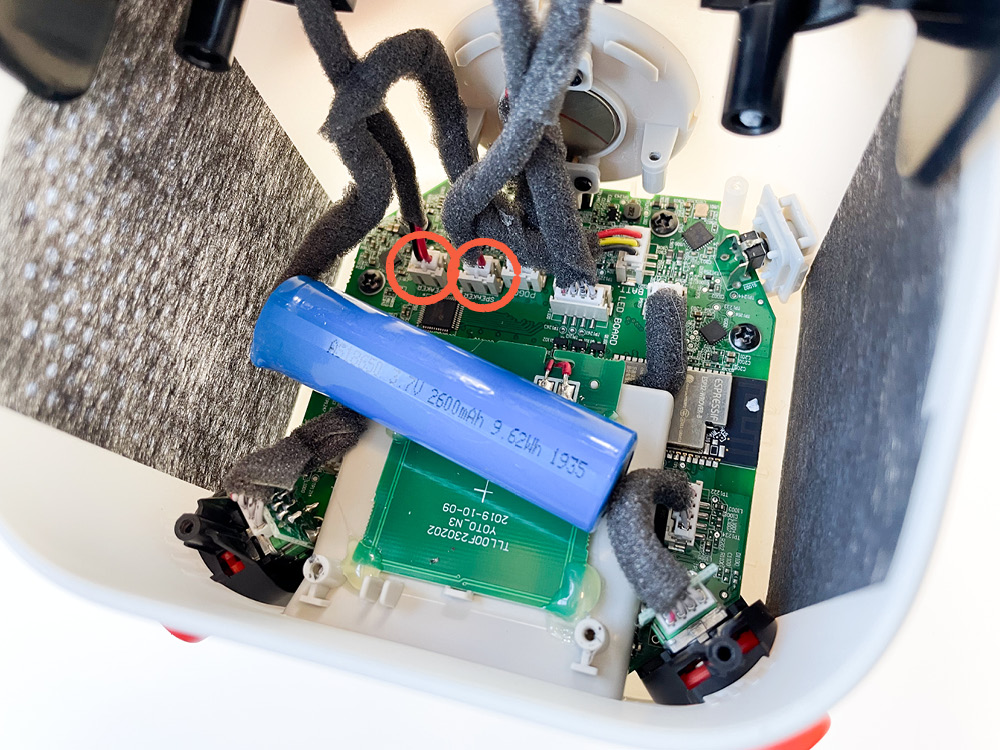
- Disconnect the two speaker cable connectors.
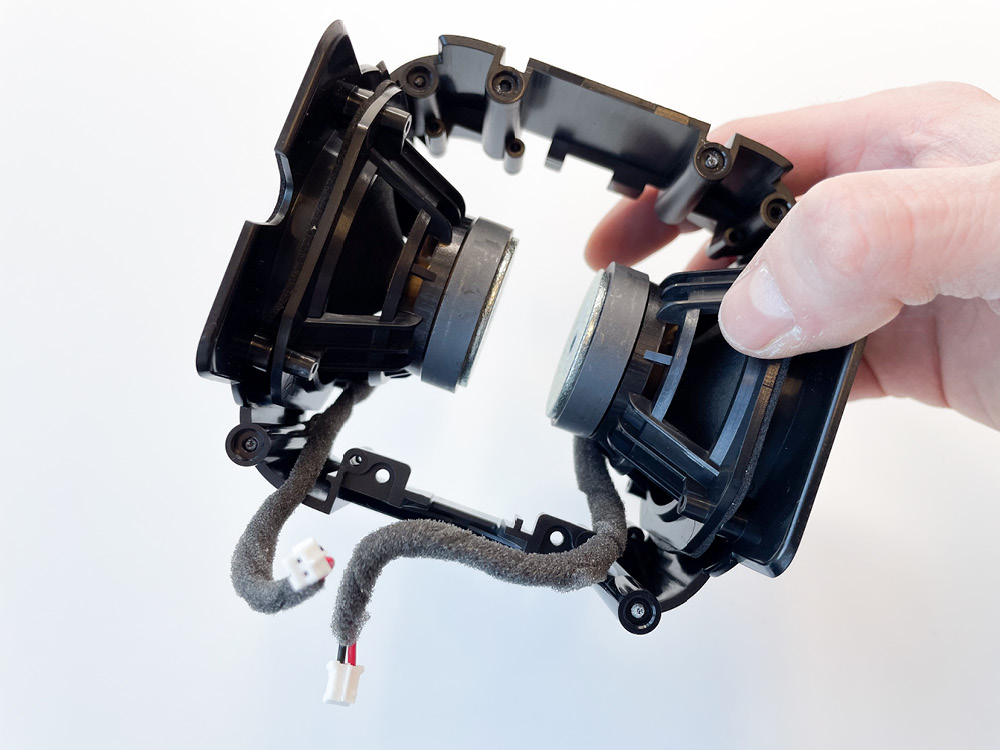
- Remove the Audio Chamber and put it carefully to one side.
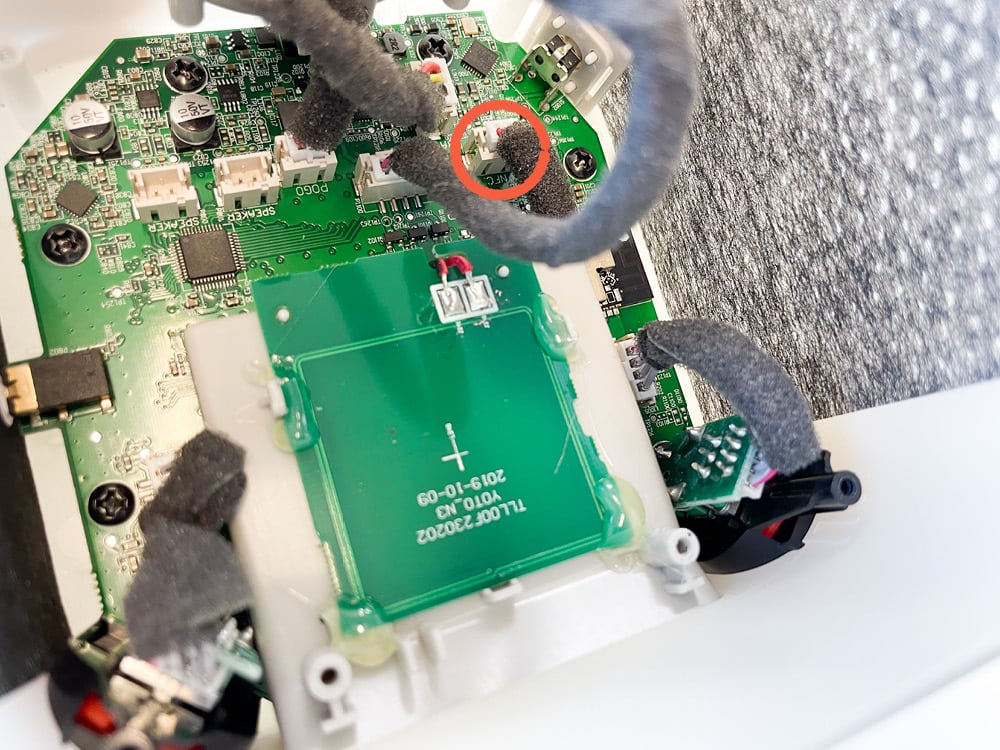
Step 5: Remove the NFC Card Slot
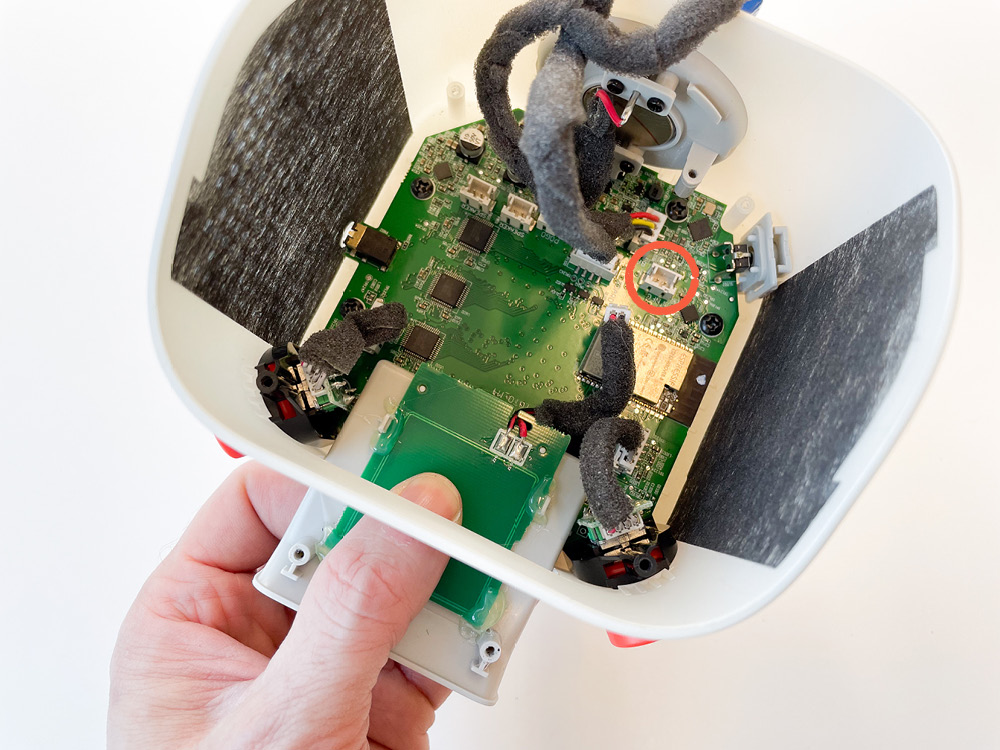
- Disconnect the NFC Card Slot cable connector.
- Slide the NFC Card Slot out carefully and put to one side.
Step 6: Replace the SD Card
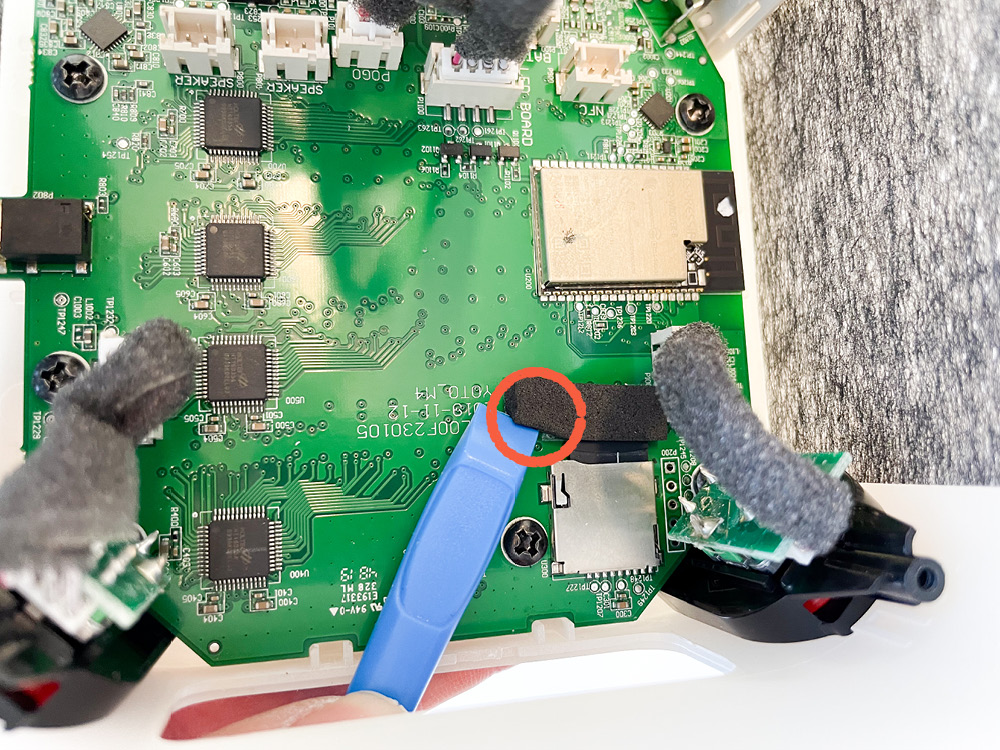
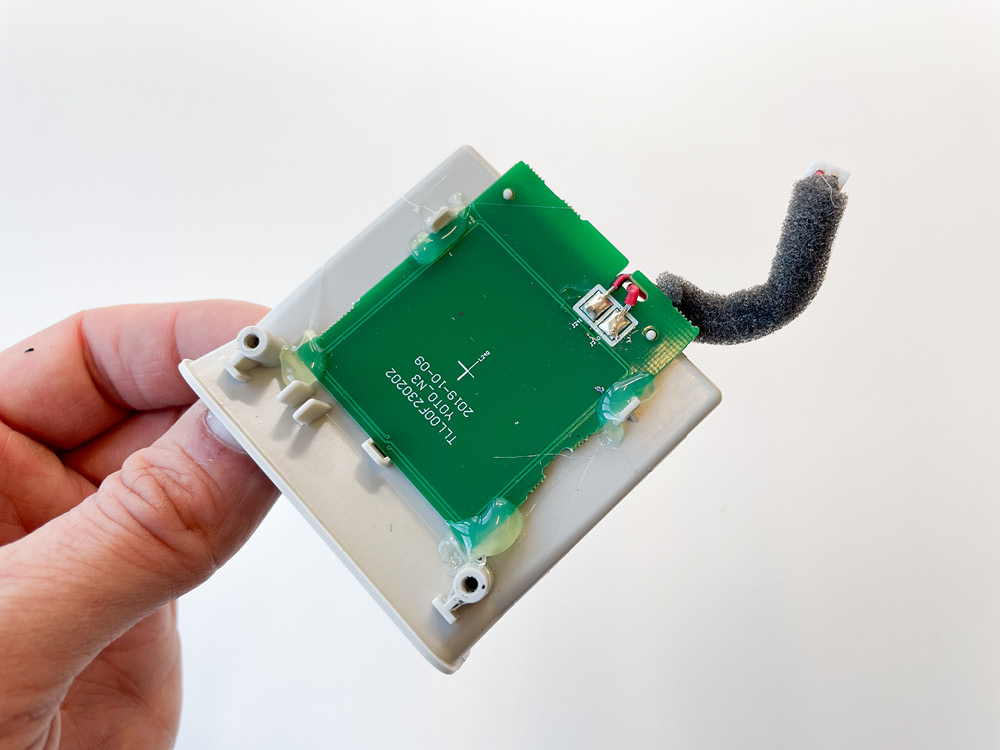
- Prize off the adhesive foam using the lever tool.
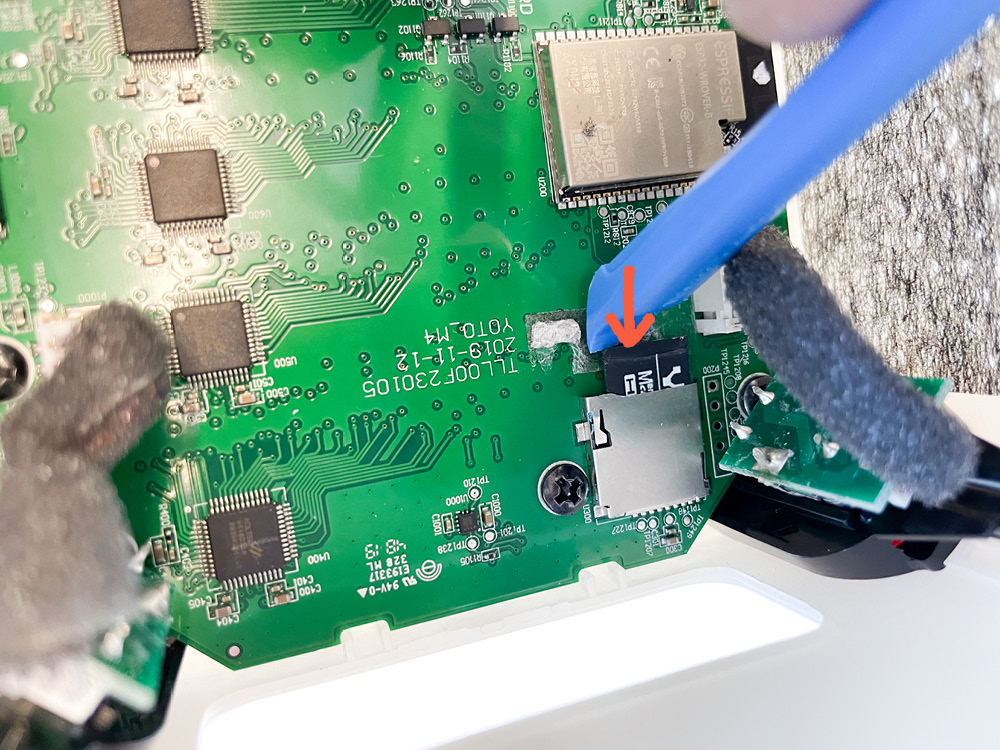
- Remove the SD card by pressing in with lever tool to release the latch (don't lever it up).
- Your unit may have a different SD cardholder design which needs to be gently lifted to release the SD card.
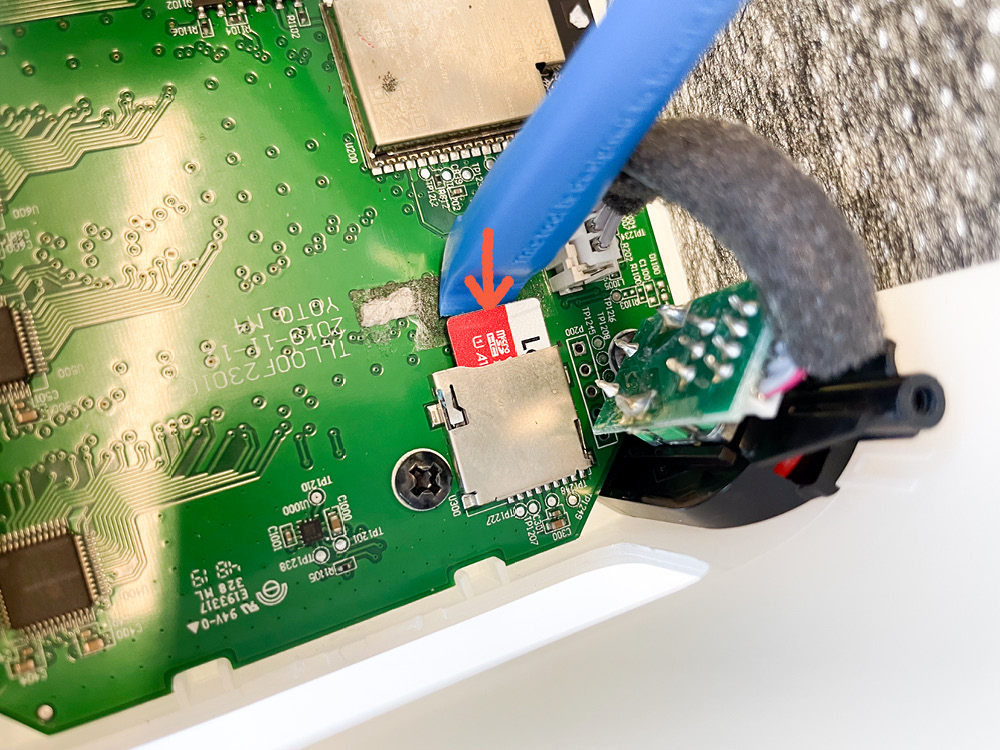
- Insert the new SD card, press till it clicks into place.
- If your unit has the other SD cardholder, insert the SD card and gently push it down to secure in place.
Step 7: Replace the NFC Card Slot
- Slide the NFC Card Slot back in place, make sure the slot is fully mounted by checking the fit from the outside.
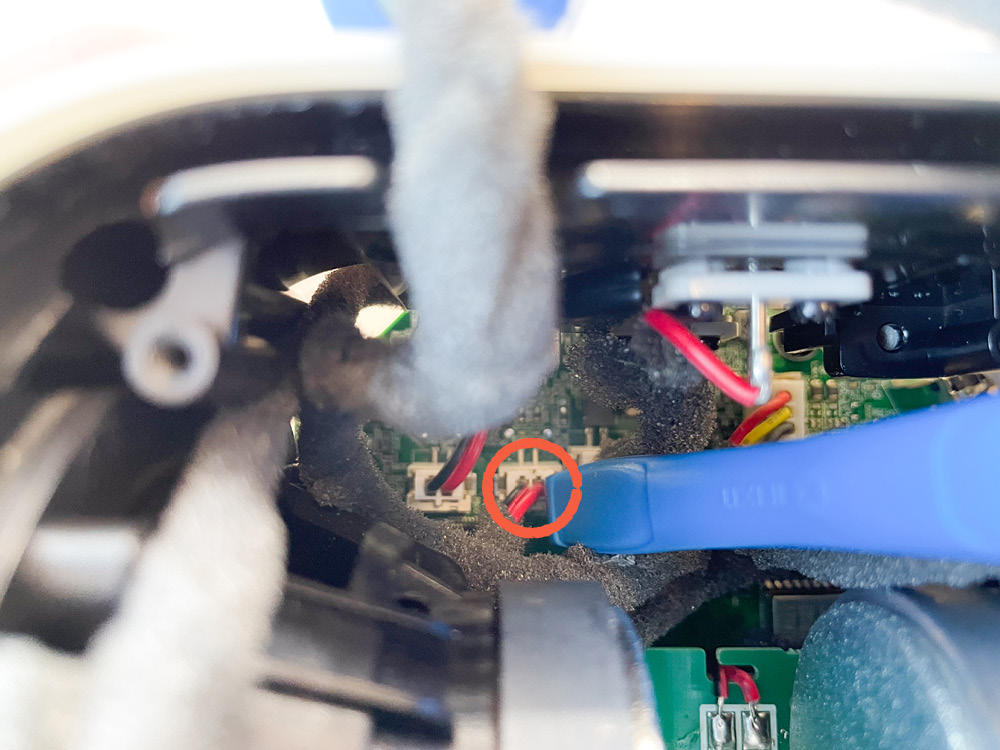
- Connect the cable as shown.
Step 8: Replace the Audio Chamber
- Sit the Audio Chamber above the Outer Body and connect the two speaker cables.
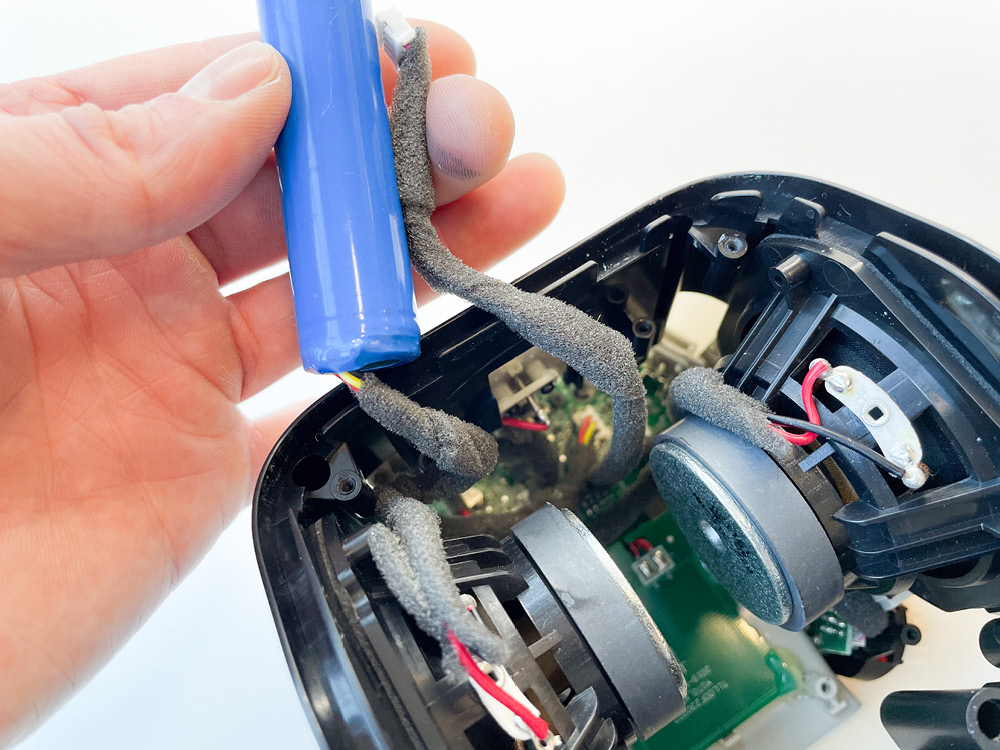
- Make sure the battery and the night light cable are both fed through the Audio Chamber.
- Carefully slide the Audio Chamber back into place.
- Check the cable connectors are still secure. Push on the shoulder of each one with the lever tool to be sure.
- Replace the first two screws that secure the NFC Card Slot, holding the card slot in position while you do so to make sure the screws engage.
- Replace the remaining 6 screws.
Step 9: Replace the Speaker Divider
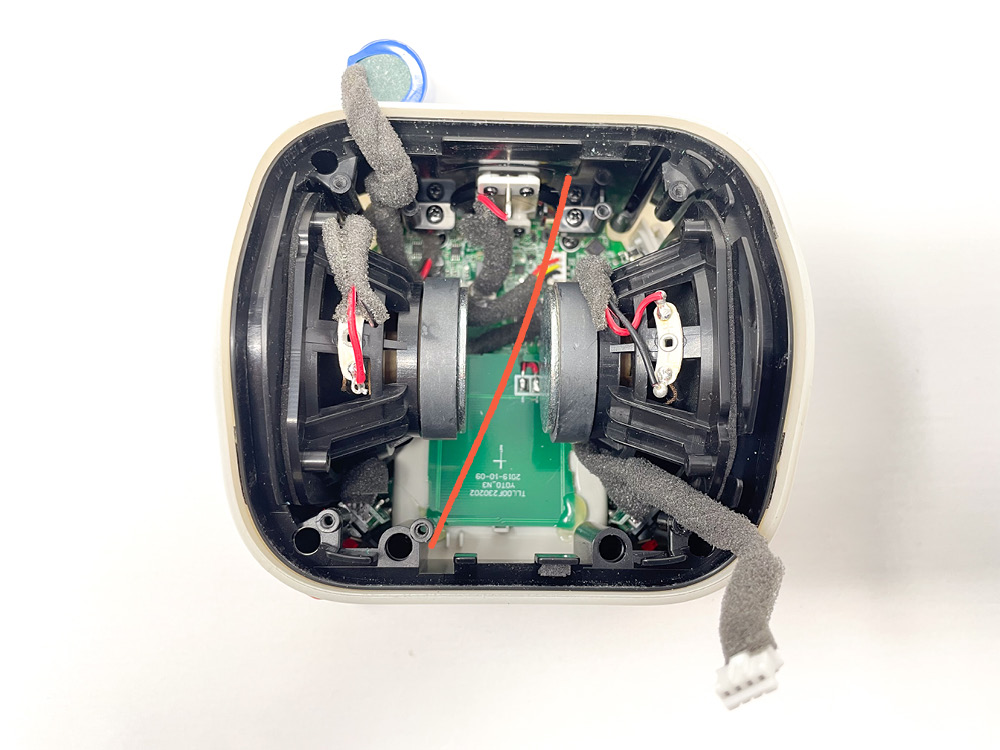
- Check cables are clear of the diagonal line where the Speaker Divider will be placed.
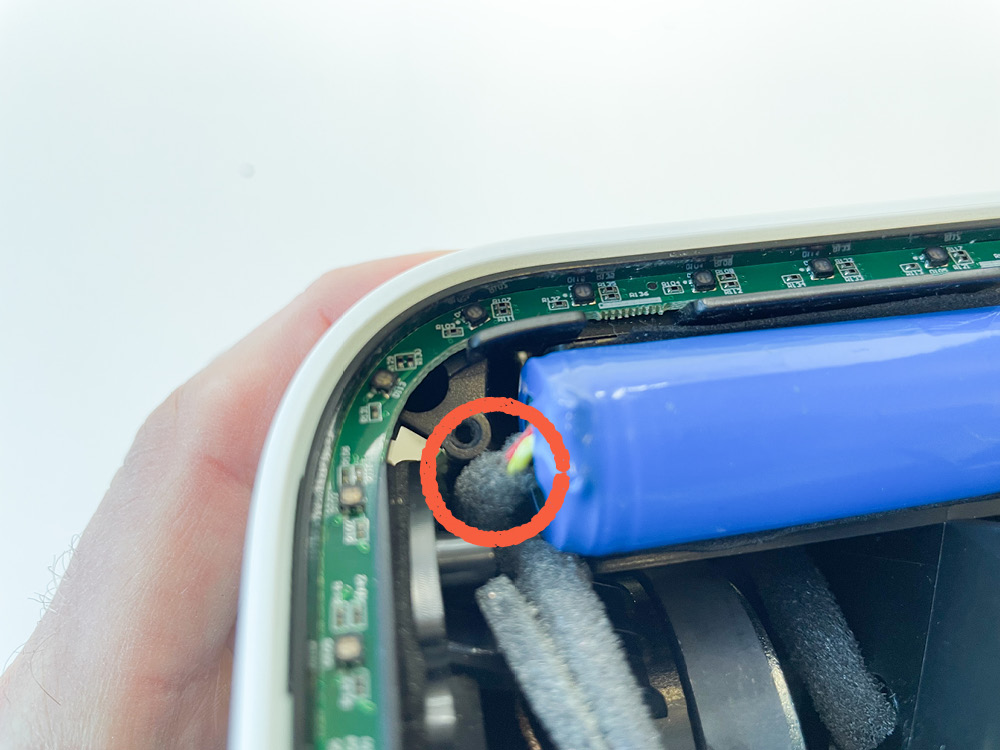
- Locate the battery cable in one corner and the LED Ring cable in the other corner, as shown, so that they don't get trapped in the wrong place.
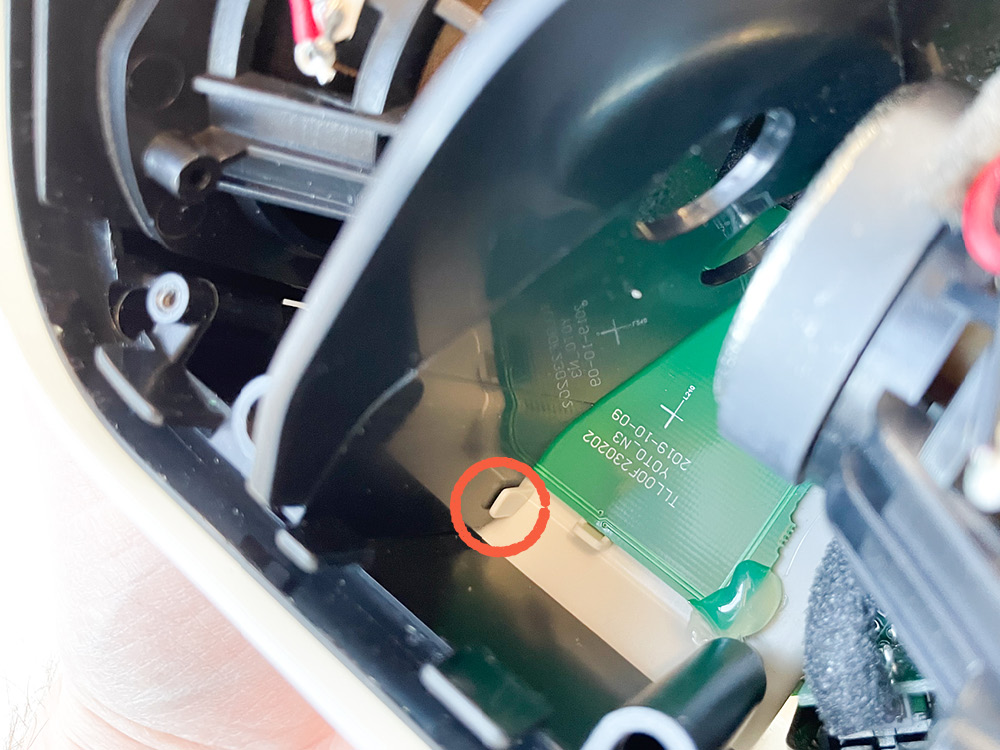
- Seat the Speaker Divider on the three screw points, checking that it is sitting in the locating point shown.

- Screw the three screws in place.
- Replace the battery in its cradle, tucking any extra cable down inside as you do so.
Step 10: Replace the night light LED Ring
- Locate the non-cable half of the ring and push it carefully down in several places.
- Connect the cable connector.
- Locate the other half of the ring and push it carefully down.
Step 11: Replace the Rear Cover
- Check that all the cables are tidy, not snagging and not interfering with the last screws you need to replace.
- Align the battery cradle to the battery.
- Ease the cover into place.
- Screw in the four screws.
- Push the rubber cover back in place in all four corners, tucking the rubber in all round.
Test your Yoto Player
- Put the Yoto Player on charge, if it needs to charge.
- Turn the player on.
- Check operation of:
- Night light - by placing Yoto Player on its front.
- Buttons - go to the Settings screen in the Yoto App (Players > Settings) and complete the ‘Button Test’ at the bottom.
- Card Play - play a card as you normally would.
- Check download operation:
- Check the download status in the app (Players > Settings > Audio download status)
- Leave the player online for 1 hour, on charge, with no card inserted and nothing playing.
- An hour later, check the download status in the app again - you should see progress in downloads.
Tell us how you got on
Click here to join the conversation over on Yoto Space (link opens in a new tab).
Share your experience of replacing the SD card in your player, and let us know how we can improve this guide.